
Illustrator is excellent for logos, packaging panels, labels, signage and single-page artwork. Its vectors stay sharp at any output size—but a vector file can still fail at press because of the wrong artboard, missing linked images, accidental spot colours, unsuitable raster effects or an uninspected PDF.
Treat the Illustrator file as the editable master and the reviewed PDF as the delivery artwork. The printer’s written specification always decides the final settings: trim size, bleed, PDF/X standard, colour condition, special inks, finishing layers and whether they need one PDF per panel or a multi-artboard file.
Start with the job specification
Before building or changing artwork, confirm these production facts:
- final trim size, orientation and the number of panels or versions;
- bleed, safe area and whether the printer wants crop marks or a clean PDF;
- print method, stock, target colour profile and any total-ink-coverage limit;
- requested PDF/X standard or printer-supplied
.joboptionspreset; - exact spot-colour names and rules for white ink, varnish, foil, dielines and embossing; and
- whether the printer wants separate files, individual artboards in one PDF, or a supplied template.
Do not create a full press sheet or impose signatures in Illustrator unless the printer has supplied an imposition plan. Most printers want correctly sized, un-imposed artwork and will add gripper, marks and imposition in their own workflow.
Set the artboard to the finished size
An Illustrator artboard should normally equal the trim size—the size of the final printed piece after cutting. It is not the paper sheet size and should not include crop marks. Use File → Document Setup to check artboards and bleed, or select the Artboard tool when you need to edit an individual artboard.
For a simple business card, label, poster or one-panel leaflet, one artboard is usually enough. For a brochure with panels, a set of labels or front-and-back artwork, use a clearly named artboard for each finished panel where that matches the printer’s request. Name them in the Artboards panel rather than relying on “Artboard 1”, “Artboard 2” and memory.
Keep important type, barcodes, QR codes, rules and logos inside a safe area. The safe area is not a universal fixed measurement: allow for the requested trim tolerance, fold, binding, die-cut variation and the visual importance of the element. A foil line placed exactly on a die-cut edge is risky even if it sits inside a generic margin.
Build bleed into the document and the artwork
Set the requested bleed in File → Document Setup before finalising the design. Then extend every background, photo, tint and rule that should reach the trimmed edge through that bleed boundary. A bleed setting alone does nothing if the artwork stops at the artboard edge.
Adobe’s printer’s marks and bleed reference explains that Illustrator can use the document bleed settings when creating a PDF. Use that option only after checking that all edge-to-edge elements genuinely extend into the bleed.

Crop marks, registration marks, colour bars and page information are not automatic signs of a professional PDF. Many printers impose clean single-page files themselves. Add marks only when the printer requests them; marks included without enough offset can clash with the bleed. For the geometry behind this, read What is bleed in print?.
Keep the source master healthy
Save an editable .ai master before producing the delivery PDF. It is where future corrections should happen. Keep a predictable project structure with the Illustrator file, source images, fonts where licensing permits, printer instructions and approved PDFs together.
Manage placed images deliberately
Illustrator artwork may contain photography, scans or raster textures. Those pixels do not become vectors merely because they sit inside an .ai file. In the Links panel, resolve missing links, inspect each image at its final placed size and keep the original source image available.
For conventional commercial print, continuous-tone images often need about 300 ppi at final size; fine one-bit artwork, technical detail and some print processes need more. Large-format work may need less because it is viewed from further away. Do not judge from an image’s pixel dimensions alone.
Embedding an image can make a portable Illustrator source, but it makes the file heavier and can hide the location of the original. Linking keeps the source easier to update, but the link must travel with the file if the printer has explicitly requested native artwork. A press-ready PDF is normally safer for routine handoff because it packages the rendered result into one reviewed file. See Graphic file formats for print for the wider file-format decision.
Check Document Raster Effects Settings
Drop shadows, glows, feathering, blur and other raster effects need an appropriate raster-effects resolution. Check Effect → Document Raster Effects Settings before delivery. A high-quality commercial-print job commonly starts at 300 ppi, but match the printer’s request and the final output scale.
Changing this setting late can alter the appearance of effects, so inspect the artwork and the exported PDF afterwards. Effects are a particular reason to avoid assuming that “all-vector artwork” needs no image-quality check.
Make colours and special inks intentional
Open the Swatches panel and remove or consolidate accidental duplicate spot colours before export. Two swatches that look alike on screen can create two separate plates if their names or definitions differ. Name every special ink exactly as the printer specifies—for example, a dieline, varnish, white ink or foil layer.
Keep a technical ink on a dedicated, clearly named layer. Follow the printer’s instructions for stroke, fill, overprint and whether the layer should be visible in the supplied PDF. Do not invent a spot swatch called “CutContour” or “Varnish” because a previous supplier used it; production systems often rely on exact naming.
For ordinary process artwork, decide the colour workflow before conversion. The printer may ask for CMYK values, a supplied output profile or a colour-managed PDF/X-4 workflow that keeps RGB images. Do not convert artwork to an arbitrary CMYK profile merely because it is headed to a press. The RGB vs CMYK guide and RGB-to-CMYK workflow explain why the intended printing condition matters.
Inspect overprint, not just appearance
Overprint changes how objects combine on press. It is often deliberate for 100% black text, trapping or special inks, but it can also make a light-coloured object disappear against a similarly coloured background. Turn on View → Overprint Preview while checking relevant artwork; it is a preview aid, not a substitute for inspecting the final PDF separations.
Use Window → Output → Separations Preview to identify process and spot plates in the Illustrator file. Toggle separations individually and look for unintended spot colours, knocks out where overprint was intended, or technical layers contaminating the artwork. Our separations, overprint and transparency guide covers the PDF-side checks in more detail.
Do not outline text by default
Keep live type in the Illustrator master. A properly prepared production PDF normally embeds permitted fonts and preserves text for search, accessibility and last-minute correction. Outlining every text object makes edits harder and can make small type less robust at lower-resolution output.
Outline a duplicate only when the letterforms must become artwork or the printer has specifically requested it. Check small counters, joins and overlaps at final size. How to outline text in Illustrator explains the safe exceptions and a sensible handoff choice.
Save a printer-ready PDF
Use File → Save As, choose Adobe PDF, and begin with the printer’s supplied preset whenever one exists. Illustrator’s Adobe PDF reference confirms that PDF/X-1a, PDF/X-3 and PDF/X-4 are available, but the standard is part of the job specification—not a universal quality ranking.
| If the job calls for | Start with | Then verify |
|---|---|---|
Printer-supplied .joboptions | The supplied preset. | It is current and intended for this stock, process and job. |
| PDF/X-4 | The specified PDF/X-4 option. | The agreed output intent, live transparency and colour-managed content are preserved as required. |
| PDF/X-1a | The specified PDF/X-1a option. | CMYK/spot colour handling and any transparency flattening meet the workflow. |
| “Print-quality PDF” | Ask for the missing details. | PDF/X standard, colour condition, bleed and delivery arrangement are defined. |
In the Save Adobe PDF dialog, give particular attention to these areas:
- General: Include the requested artboards only. A multi-artboard PDF can be appropriate for a set of labels or panels, but confirm the order and whether the printer instead needs separate files.
- Compression: Preserve sufficient resolution at final size. Do not send a screen-proof PDF as final production art.
- Marks and Bleeds: Select Use Document Bleed Settings if the document is correctly set up. Add marks only when requested.
- Output: Follow the agreed colour conversion and output-intent instruction. Preserve required spot colours; do not enable a setting that converts them to process without approval.
- Advanced: Keep fonts embedded unless there is a specific production instruction. Preserve editing capability only when a recipient needs to reopen the PDF in Illustrator; it usually adds unnecessary file weight to a delivery PDF.
PDF/X-4 often suits modern workflows because it can preserve live transparency. PDF/X-1a remains necessary in some established workflows. Neither option repairs a wrong trim size, an unapproved colour conversion or an incorrectly named finishing swatch.
Check the exported PDF, not only the Illustrator file
Open the newly saved PDF in Acrobat Pro or the printer’s approved preflight system. Review it as the printer will receive it.
Start with a visual proof: page count, artboard order, trim, bleed, small text, barcodes, image edges, transparency effects and each special-finishing layer. Then use the production tools to check page boxes, effective resolution, embedded fonts, output intent, total ink coverage where specified, and process/spot separations.
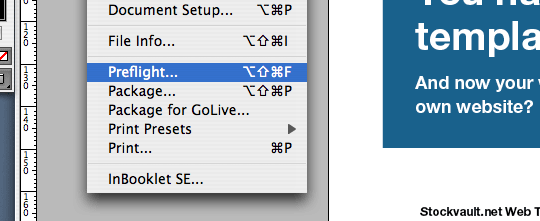
The press-ready PDF checklist gives a complete final inspection routine. If the output preview exposes a spot colour, overprint or transparency surprise, correct the Illustrator master and export again; do not patch the PDF unless that is an agreed, controlled part of the workflow.
Illustrator print-preparation checklist
- Artboards equal the requested finished trim size and are named in delivery order.
- Bleed is set in the document and all edge-to-edge artwork extends through it.
- Critical content stays clear of trims, folds, binding, die cuts and safe-area risks.
- Links are current; raster images and effects have suitable resolution at final size.
- Process swatches, spot colours and special-finishing layers are intentional and named exactly as required.
- Overprint Preview and Separations Preview show the expected plate behaviour.
- The PDF/X standard, output intent, colour conversion, marks and artboard arrangement follow the printer’s specification.
- Fonts are embedded unless a specific instruction says otherwise.
- The exported PDF—not just the
.aisource—has passed visual, preflight and separation checks.