
Exporting a PDF is the moment a flexible InDesign layout becomes production artwork. That change matters. The PDF will be inspected, imposed, rasterised and printed by systems that do not know what you intended. It must carry the right page geometry, image data, fonts, colour information and printing behaviour—not merely look correct when opened on your screen.
There is no universally correct export preset. A PDF/X-4 file that is excellent for one printer can be unsuitable for a workflow that explicitly asks for PDF/X-1a, single pages, no marks or a particular output condition. Treat the printer’s specification as the instruction and this guide as the route for carrying it out.
Start before the Export command
Collect the production requirements before changing a PDF setting. Ask for them in writing if they are not already on the job ticket:
- final trim size, orientation, page count and delivery as single pages or spreads;
- bleed and safe-area requirements, plus whether marks or a slug are wanted;
- print process, substrate and any target colour profile or output condition;
- requested PDF standard or printer-supplied InDesign/PDF preset;
- spot-colour, dieline, varnish, foil, emboss or white-ink naming rules;
- image-resolution threshold, total-ink limit and proof requirement; and
- whether the printer will impose pages, add a spine, fold signatures or make any finishing layers.
The last point prevents a common mistake: sending printer’s spreads or manually imposed sheets when the printer needs reader’s pages. A PDF can be technically valid while still being the wrong delivery format.
Prepare the InDesign file first
PDF export cannot repair a document that was built to the wrong size or with missing links. Open Window → Output → Preflight, use a profile that reflects the job where possible, and resolve errors deliberately. Our guide to preflight checking in InDesign covers a practical way to build that source-file check. A warning about a low-resolution image may be acceptable on a large-format display, but not in a small catalogue photograph. Do not switch warnings off just to make the indicator green.
Check the following in the layout before export:
- The page size is the finished trim size, not the size including crop marks or bleed.
- Artwork intended to reach an edge extends to the bleed guide.
- Type, rules, barcodes and QR codes sit inside the safe area.
- Linked images are present, current and appropriate at their placed size.
- Process and spot swatches have intentional names; duplicate or unused spot swatches are removed.
- Dielines and special finishes live on clearly named layers and use the printer’s exact spot-colour names.
- Page numbers, prices, URLs, legal text and version labels have an editorial check as well as a technical one.
For a document with facing pages, inspect the centre spread as carefully as the outside edges. A perfect-bound or case-bound book has a gutter and a spine; a saddle-stitched booklet also loses some usable space near the fold as pages move outwards. These are design decisions, not PDF settings.
Choose Adobe PDF (Print), not Interactive PDF
Use File → Export, select Adobe PDF (Print) and give the production file a clear, versioned name. Interactive PDF is intended for screen features such as buttons, media and form behaviour. It is not the normal route for a commercial-print handoff.
The export window groups the important controls into General, Compression, Marks and Bleeds, Output and Advanced. Adobe’s current reference describes the same areas and notes that Standard chooses the PDF/X format while Output manages colour conversion and the PDF/X output intent. Read Adobe’s export-options reference when interface labels differ between versions.
Select the PDF standard only after reading the specification
PDF/X is a family of exchange standards for print. It is valuable because it constrains a PDF and records output intent, but it is not a promise that the artwork is correct. It cannot know the intended fold, whether the client approved the latest price, or if a 6 pt reversed line will survive on uncoated stock.
| If the specification says | Start here | What to verify |
|---|---|---|
| A printer-supplied preset | Use that preset without casually substituting another. | Confirm it is current and for this process, stock and job type. |
| PDF/X-4 | Select the requested PDF/X-4 option. | Live transparency and colour-managed content are allowed for an appropriate modern workflow. |
| PDF/X-1a | Select the requested PDF/X-1a option. | The workflow expects its stricter, older exchange model; do not override it because X-4 sounds newer. |
| “Press-quality PDF” | Ask which PDF/X standard, profile and page delivery are required. | “Press quality” alone is not a usable production specification. |
| No PDF/X request | Use the printer’s advice; otherwise ask before deciding. | Preserve the agreed colour strategy and document it with the job. |
PDF/X-4 is often appropriate for modern workflows because it can retain live transparency and colour-managed content. PDF/X-1a remains common in established workflows. Neither choice should be made from habit. The Ghent Workgroup PDF/X workflow guide is a useful industry reference, but a printer’s actual RIP, press and job profile still take priority.
Do not treat a preset as a magic button
Adobe’s built-in presets are a starting point, not evidence that the result meets the job ticket. Selecting a PDF/X preset can lock or alter related controls. Read the Summary panel before exporting and save a named preset only after it has been approved for a repeatable type of work. A preset for a coated-sheetfed brochure should not silently become the preset for a newspaper, sign, packaging file or digital job.
General: export the right pages
For most commercial-print jobs, choose Pages, not Spreads. A page PDF gives the printer the individual pages needed for imposition. A reader’s spread is an editorial view of adjacent pages; it is not a printer’s spread. Supplying spreads can cause trouble with bleed, crossover images, folding and automated imposition.
There are exceptions. A printer may ask for spreads for a gatefold, a display panel, a simple office-print booklet or a specific workflow. Follow that explicit instruction. Never make your own imposed signatures unless the printer has asked for them and supplied the imposition plan.
Enable View PDF after Exporting for a deliberate first inspection. Leave document-editing capabilities off for a delivery PDF unless a recipient specifically needs them; they add information and file weight without helping a print workflow. Avoid password protection, security restrictions and web-only optimisation in a production file unless they are part of the agreed delivery method.
Compression: preserve enough data at the placed size
Compression settings govern the images inside the PDF, not the quality of the vector type and shapes in your InDesign layout. For a conventional high-quality commercial-print job, a practical starting point is bicubic downsampling to 300 ppi for colour and grayscale images above 450 ppi, with JPEG Maximum or a job-approved alternative. It is a starting point, not a rule for every process.
Line art, one-bit scans, fine technical drawings and barcodes can need a higher effective resolution. Conversely, a large poster read from several metres away may work well with substantially less image data. Judge resolution at the final placed size and against the process, screen ruling and viewing distance. For help choosing and preparing the source assets in the first place, see Graphic file formats for print.
Use lossless ZIP compression for graphics with broad flat colours, sharp UI elements or repeated patterns when file size permits. JPEG is generally effective for continuous-tone photography, but repeated JPEG compression can damage edges and smooth tonal areas. Do not export a low-resolution proof PDF, then send that proof PDF to the printer as the final artwork.
Do not use pixel dimensions as a verdict
An image may be 6,000 pixels wide and still be inadequate if it is enlarged dramatically; a smaller image can be perfectly suitable at a small placed size. InDesign’s Links panel and Acrobat’s preflight tools help reveal effective resolution. Use them to investigate, then decide in the context of the job.
Marks and Bleeds: include what the printer actually needs
The bleed belongs to the artwork, not just the exported PDF. Set it in File → Document Setup so that the layout reveals whether backgrounds and images really extend beyond the trim. In the export dialog, select Use Document Bleed Settings when the document has been correctly built to the requested bleed.

Do not automatically select crop marks, registration marks, colour bars or page information. Many printers add their own marks during imposition and prefer clean, correctly sized single pages with bleed. Other workflows explicitly require marks. This is why the printer’s template and specification prevail over an internet default.
The slug is a separate area outside the bleed. It can hold job notes, colour bars or version information, but it is normally cut away. Include it only where the printer has requested it; accidental slug content can expose internal notes or become a production nuisance.
For a fuller explanation of geometry, read What is bleed in print?.
Output: make colour decisions once, with a destination in mind
The Output panel is where well-meant defaults create avoidable colour changes. First find out which colour strategy the printer expects.
If the printer supplies a profile or approved preset, use it. If they ask for an ICC output condition, select the exact condition rather than a profile with a similar name. An output intent records the intended printing condition in a PDF/X file; it does not by itself turn an unsuitable image into the right CMYK separation.
| Job instruction | Sensible response in InDesign | Avoid |
|---|---|---|
| “Use our supplied PDF preset” | Use it, then inspect the Summary and final PDF. | Replacing its profile because another profile is familiar. |
| “Deliver CMYK only” | Convert as instructed, using the supplied destination/output intent. | Blindly converting objects again in Acrobat after export. |
| “Keep RGB / PDF/X-4 workflow” | Preserve the agreed colour-managed workflow and output intent. | Forcing all objects to CMYK merely because it is a print job. |
| Spot colours must remain spot | Preserve their spot definitions and exact names. | Simulating overprint or converting spots to process without approval. |
| No colour instruction | Ask the printer before exporting. | Assuming an old regional profile is current or appropriate. |
Convert to Destination (Preserve Numbers) can be useful in a controlled CMYK workflow, but it is not a universal safe choice. Native CMYK values may be deliberately preserved, which can be right or wrong depending on their source and the intended condition. Similarly, Simulate Overprint is not a normal production-export safety switch: it can turn spot colours into process equivalents and change the separation structure. Use it only when its specific output behaviour is wanted.
Keep an RGB, profile-aware source master when it is useful for a broader campaign, but do not confuse that master with the press delivery. Our RGB vs CMYK guide and RGB-to-CMYK workflow explain the underlying colour choices.
Advanced: fonts, transparency and layers
Fonts should ordinarily embed or subset embed in the export. Do not outline every type object as a reflex. Outlining can make small type harder to inspect, removes editable text semantics and can complicate later corrections. Only outline when the print provider specifically instructs you to do so, or where an agreed technical issue demands it.
Avoid transparency flattening in a modern PDF/X-4 workflow. Flattening divides transparent artwork into smaller pieces and can create seams, altered overprints or unexpected rasterisation if handled badly. It remains relevant only for workflows that require an older compatibility level or a specific PDF/X-1a approach. If you must flatten, inspect the final PDF carefully, especially shadows, soft gradients, overprint and spot-colour interactions.
Do not export hidden guide layers, non-printing notes or unused alternates merely because they exist in the working document. Make the intended printing layers explicit. For a finishing layer, use the agreed spot name, set its overprint behaviour as specified, and make the layer’s purpose unambiguous to prepress.
Export, then inspect the PDF—not the InDesign file
Open the newly exported PDF in Acrobat Pro or the agreed preflight system. The delivery PDF is the object that will reach the RIP, so it is the file that deserves final inspection.
Start with a visual pass at normal view and at high magnification. Check page count, order, orientation, the first and last pages, all master-page variants, small type, hairlines, QR codes, image edges and all pages with transparency or special finishes. Compare important information with the approved source, not with memory.
Then check the production behaviour:
- Inspect TrimBox and BleedBox, rather than estimating the page size from crop marks.
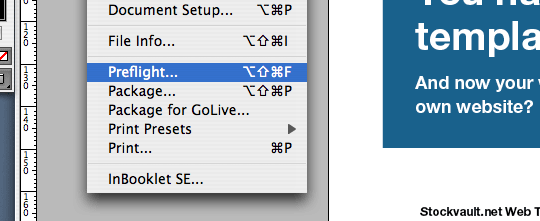
- Run the job-appropriate preflight profile and review every warning.
- Inspect effective image resolution and compression at final placed size.
- Check that fonts are embedded and critical glyphs render correctly.
- Open Output Preview and toggle process and spot separations individually.
- Confirm intended spot colours, varnish, foil, white ink and dielines are named and separated correctly.
- Use total-area-coverage preview where the job has an ink limit.
- Check the PDF/X information and output intent against the job ticket.
For the complete Acrobat-side checklist, continue to Press-ready PDF checklist for pre-press designers. For plate behaviour that screen preview can hide, see Separations, overprint and transparency.
A repeatable handoff routine
The reliable workflow is small enough to repeat:
- Confirm the job ticket and printer’s requirements.
- Preflight the InDesign source and correct issues at their cause.
- Export Adobe PDF (Print) using the approved preset or exact agreed settings.
- Inspect the final PDF visually and with production tools.
- Compare its page boxes, colours, separations and version against the job ticket.
- Send the reviewed file with an unambiguous filename and any requested job notes.
Save a project-specific export preset after a job succeeds, but label it with its purpose and conditions—for example, the printer, process and stock family. A generic preset named PRINT FINAL eventually becomes a source of mistakes because nobody knows what it assumes.
Print-ready PDF export checklist
- The printer’s requested PDF/X standard, profile and delivery method are known.
- The InDesign document has the correct trim, bleed, pages and current links.
- Pages—not spreads or self-imposed sheets—are exported unless instructed otherwise.
- Image compression and effective resolution suit the job at final size.
- Bleed is included, while marks and slug are included only when requested.
- Colour conversion, output intent and spot-colour treatment match the specification.
- Fonts are embedded; transparency and special-finish layers have been checked.
- The exported PDF has passed visual inspection, preflight and separation review.